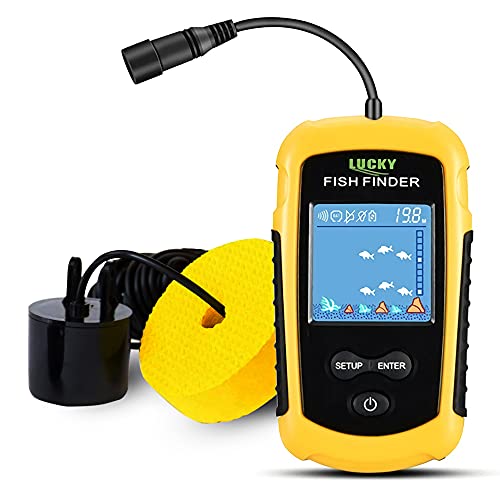
How to Mount a Fish Finder on a Kayak Without Drilling
Mounting a fish finder on your kayak without drilling is an excellent way to enhance your fishing experience. This guide will walk you through the process, ensuring you can easily and effectively install your fish finder while keeping your kayak intact. Before you begin, always ensure you’re working in a safe environment, and consider wearing protective gear if necessary.
Disclosure: As an Amazon Associate I earn from qualifying purchases at no cost for you.

- All-in-One Kit for Kayaks, SUPs & Small Boats: Our kayak transducer mounting arm is idea…
- Instant Install—No Tools, No Drilling, No Hassle: Mounts to your kayak’s gear track in s…
- Built for the Outdoors, Ready for Saltwater: Made from marine-grade composite and stainl…
What You’ll Need
To mount a fish finder on your kayak without drilling, you’ll need the following tools and materials:
- A suitable fish finder mount, such as the EDSRDPLT Universal Kayak Fish Finder Mount or similar models.
- A fish finder compatible with your kayak setup (e.g., Garmin, Lowrance, or Humminbird).
- Measuring tape to determine the best placement for your fish finder.
- Marker to mark the position of the mount on your kayak.
- Cleaning supplies to prepare the mounting area for adhesion.
Step-by-Step
- Identify the best location on your kayak for the fish finder. It should be easily visible and accessible while paddling.
- Clean the area where you plan to mount the fish finder using a suitable cleaner to ensure a good grip.
- Using the measuring tape, measure and mark the position where the mount will be installed. Ensure it aligns with your preferred viewing angle.
- Attach the mount to your kayak’s track system, if applicable. Many mounts, like the EDSRDPLT, offer tool-free installation, making this step quick and easy.
- Secure the transducer arm to the mount according to the product’s instructions. Ensure it is firmly attached but can still be adjusted for optimal sonar readings.
- Connect your fish finder to the mount and ensure it is securely fastened. Check for any loose connections.
- Adjust the transducer arm to the desired angle and depth. This is crucial for accurate readings and optimal performance.
- Test the setup by turning on your fish finder and checking the display for clarity and functionality. Make any necessary adjustments.
Pro Tips for Better Results
- All-in-One Kit for Kayaks, SUPs & Small Boats: Our kayak transducer mounting arm is idea…
- Instant Install—No Tools, No Drilling, No Hassle: Mounts to your kayak’s gear track in s…
- Built for the Outdoors, Ready for Saltwater: Made from marine-grade composite and stainl…
To maximize the performance of your fish finder, consider these tips:
- Ensure the transducer is submerged properly; it should be in the water when the kayak is moving.
- Regularly check the mount for tightness, especially after traveling over rough waters.
- Position the fish finder where it can be easily viewed but does not obstruct your paddling or fishing activities.
- Consider using a fish finder with a wireless connectivity option for added convenience.
Common Mistakes
Avoid these common pitfalls when mounting your fish finder:
- Not cleaning the mounting area properly, which can lead to a weak bond.
- Installing the mount in a location that obstructs your view or access to other equipment.
- Ignoring the importance of adjusting the transducer for optimal sonar performance.
- Failing to periodically check the mount for wear and tear, which could jeopardize the stability of your setup.
Troubleshooting
If you encounter issues with your fish finder setup, consider the following solutions:
- If the fish finder display is unclear, check the transducer angle and depth, making adjustments as necessary.
- If the mount feels loose, re-tighten all connections and ensure the mount is securely attached to the kayak.
- If the fish finder is not powering on, check all electrical connections and ensure the battery is charged.
- If you experience interference on your sonar readings, reposition the transducer away from other electronic devices.
Maintenance / Next-Time Checklist
To ensure your fish finder remains in top condition, follow this checklist:
- Inspect the mount and transducer for any signs of wear or damage before each outing.
- Clean the transducer regularly to prevent algae and debris buildup.
- Store the fish finder and mount in a safe, dry place when not in use to prevent corrosion.
- Check the batteries and connections periodically to ensure everything is functioning properly.
Recommended Products & Tools
Here are some products that can enhance your fish finder experience:
- EDSRDPLT Universal Kayak Fish Finder Mount: This mount is tool-free and easy to install, making it perfect for quick setups.
- WINDFRD Fish Finder Track Mount: This offers a sleek design and allows for simultaneous installation of the display and transducer.
- iBOLT IncrediBOLT Fish Finder Handlebar Mount: Ideal for ensuring your fish finder is secure, even in rugged conditions.
- HITORHIKE Kayak Fish Finder Mount: This offers excellent durability and is compatible with multiple brands, ensuring versatility.
FAQ
1. Can I mount my fish finder on any kayak?
Yes, as long as the kayak has a gear track or flat surface to attach the mount.
2. Will mounting affect my kayak’s stability?
Properly installed mounts should not significantly affect stability, but always ensure even weight distribution.
3. How do I know if my transducer is positioned correctly?
The transducer should be submerged in water and angled for optimal sonar performance.
4. Can I use my fish finder in saltwater?
Yes, but ensure your mount and fish finder are made from corrosion-resistant materials.
5. What if my fish finder isn’t working after installation?
Check all connections, ensure the battery is charged, and verify that the transducer is properly submerged.

- 2-in-1 Ultimate Angler Combination – Engineered specifically for kayak and SUP anglers, …
- 360° Infinite Adjustability & Perfect View – Features advanced 1.5-inch double-socket ba…
- Extendable Arm & Quick Slide Track Base – Adapt seamlessly to any water depth or watercr…
Wrap-Up
Mounting a fish finder on your kayak without drilling is a straightforward process that can greatly enhance your fishing experience. By following the steps outlined in this guide, you can ensure a secure, functional setup that keeps your kayak intact. Always remember to maintain your equipment and make adjustments as needed for optimal performance. Happy fishing!
Recommended Products & Tools
- All-in-One Kit for Kayaks, SUPs & Small Boats: Our kayak transducer mounting arm is idea…
- Instant Install—No Tools, No Drilling, No Hassle: Mounts to your kayak’s gear track in s…
- Built for the Outdoors, Ready for Saltwater: Made from marine-grade composite and stainl…

- 2-in-1 Ultimate Angler Combination – Engineered specifically for kayak and SUP anglers, …
- 360° Infinite Adjustability & Perfect View – Features advanced 1.5-inch double-socket ba…
- Extendable Arm & Quick Slide Track Base – Adapt seamlessly to any water depth or watercr…

- The iBOLT Fish Finder IncrediBOLT Clamp is the perfect way to keep your Fish finding dev…
- WORKS WITH ALL INDUSTRY STANDARD 1-INCH MOUNTS: Features 1-inch / 25mm / B Size Ball joi…
- INSTALLATION is a breeze – no drilling required. The heavy-duty clamping system ensures …

- 1. Our Fish Finder is compatible with a variety of fish finder brands, including Garmin,…
- 2. T-Bolt-No Rrill freedom: Mounts to common kayak tracks in minutes; ideal for quick in…
- 3. Durable and Corrosion-Resistant Materials: Made from high-performance Dupont nylon, t…

- 【Sturdy and Reliable】This marine electronic device mount made of long arms is an excelle…
- 【Multiple Installation Options】The product comes with a 16*5.5cm device mounting board …
- 【Universal Compatibility】The rectangular board has multiple pre-drilled hole combinatio…

- 【 Corrosion-Proof Marine-Grade Construction】High-strength composite basez, hardware with…
- 【RETRACTABLE 】Protect your expensive electronics. The transducer mounting arm features a…
- 【UNIVERSAL COMPATIBILITY】Compatible with Garmin Striker 4, Striker Plus 4, Striker Vivid…